Installing OPNsense
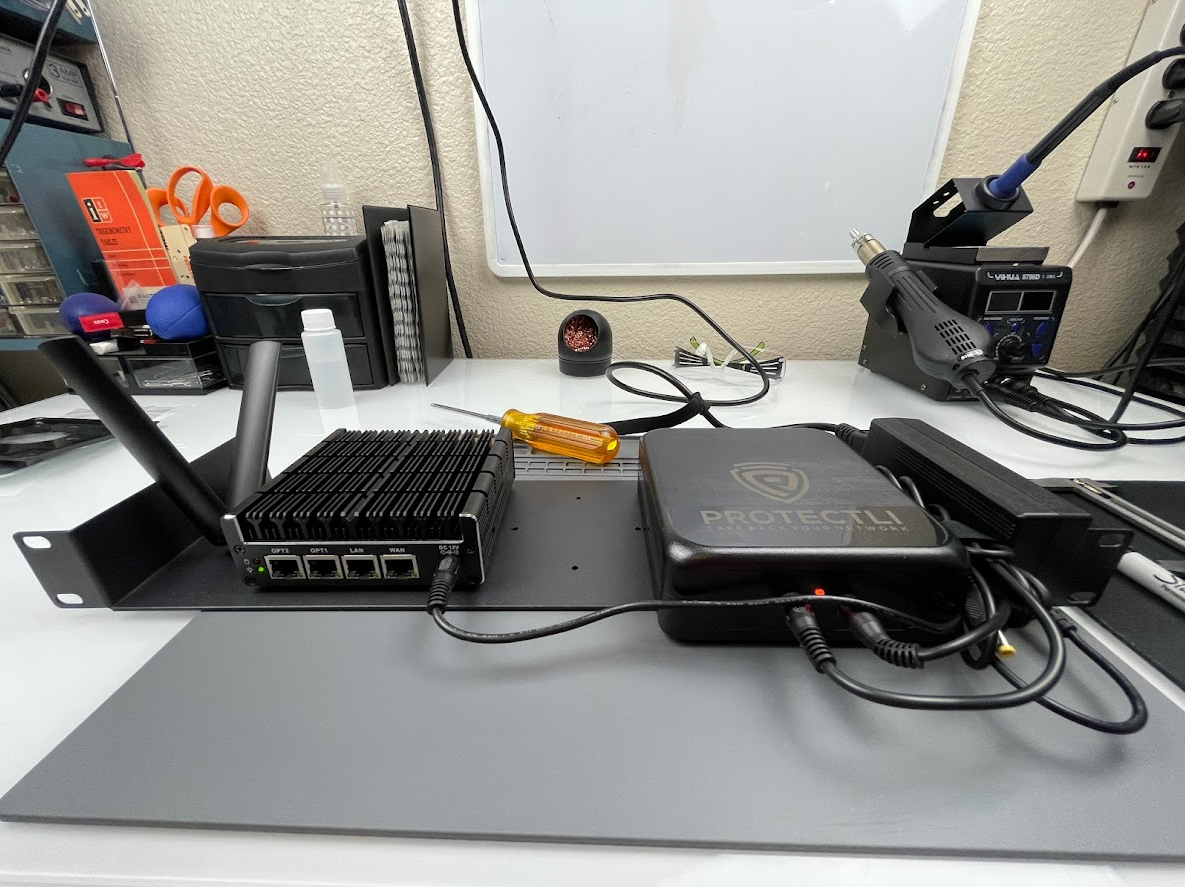 Finished product
Overview
This is continuation of my Protectli OPNsense Router Project series. Head over to Part 1 - Project Overview for a complete overview of the project.
I’ll cover how to install OPNsense. For complete (and up to date) instructions and hardware requirements for installing OPNsense head over to: https://opnsense.org/users/get-started/.
Generally any recent (10 years old or less) Intel or AMD processor with 2GB of RAM and 16GB of hard drive storage is suitable. If it can run Windows 10, it should, for the most part run OPNsense. The more important component is the network cards. I always try to get Intel based network cards because they have better driver support in FreeBSD, the OS that OPNsense is based on. I rocked FreeBSD as my main desktop until 5.x. Glad we’re past that, was some rough waters.
Here we walk through the following steps:
- Downloading the OPNsense installer image
- Verifying the download integrity
- Extracting the downloaded file
- Writing the image to a USB flash drive
- Installing the OPNsense operating system
Download OPNsense
Download OPNsense directly from the OPNsense website at https://opnsense.org/download/.
Be aware that the latest installation media does not always correspond with the latest released version. OPNsense installation images are provided on a regular basis together with major versions in January and July. You WILL need to install updates once the install is complete.
Select the version that best matches your target hardware. I’m selecting amd64 and dvd.
Verify File Integrity
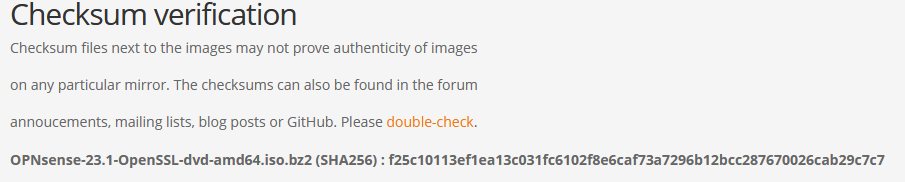
On the download page you should see the SHA256 checksum. This is a fingerprint of the file. If the file has been altered in any way the fingerprint will change. This could be though a bad actor, or a bad download. This checksum can be validated easily in Windows or Linux/Unix with a quick command.
Windows
You can use Windows Powershell to calculate the SHA-256 checksum for a file.
- Open Windows Powershell. (To do this, type Powershell in the Windows Start menu command box.)
- Type
"Get-FileHash "followed by a space. - Drag the downloaded ZIP file onto the Windows Powershell window after the
Get-FileHashcommand.- This inserts the path after the command, to look like the following screen text:
PS C:\Users\UserName> Get-fileHash C:\Users\UserName\Downloads\OPNsense-23.1-OpenSSL-dvd-amd64.iso.bz2
- Compare the
Hashstring PowerShell gives you with the hash string on the OPNsense website. If they match your image is valid.
1
2
3
4
5
6
7
8
PowerShell 7.3.4
PS C:\Users\wwtw> get-filehash C:\Users\wwtw\Downloads\OPNsense-23.1-OpenSSL-dvd-amd64.iso.bz2

Algorithm       Hash                                                                   Path
---------       ----                                                                   ----
SHA256          F25C10113EF1EA13C031FC6102F8E6CAF73A7296B12BCC287670026CAB29C7C7       C:\Users\wwtw\D…

PS C:\Users\wwtw>
Linux
Linux has a similar process as Windows.
- Open terminal window.
- Type
sha256sumfollowed by a space and the file name. - Compare the hash string on the left
sha256sumgives you with the hash string on the OPNsense website. If they match your image is valid.
1
2
3
kevin@WWTW-01:~$ sha256sum OPNsense-23.1-OpenSSL-dvd-amd64.iso.bz2
f25c10113ef1ea13c031fc6102f8e6caf73a7296b12bcc287670026cab29c7c7  OPNsense-23.1-OpenSSL-dvd-amd64.iso.bz2
kevin@WWTW-01:~$
Extract the Download
Linux
bunzip (filename) This will take a minute or two.
1
kevin@WWTW-01:~$ bunzip2 OPNsense-23.1-OpenSSL-dvd-amd64.iso.bz2
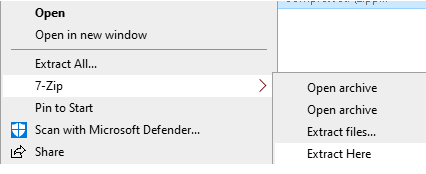
Windows
Download and install 7-Zip Select the 64-Bit x-64 .exe file (Unfortunately, they do not provide a file hash here) https://www.7-zip.org/
Once installed, right click on the OPNsense bz2 file and select, 7-Zip, Extract Here. This will take a minute or two.
Write the image to a USB flash drive
Linux
1
dd  if=OPNsense-##.#.##-[Type]-[Architecture].img of=/dev/sdX bs=16k
where X = the IDE device name of your USB flash drive (check with hdparm -i /dev/sdX) (ignore the warning about trailing garbage - it is because of the digital signature)
Windows
Lot’s of solutions exist for making bootable flash drives or a bootable CD. If you have something your prefer, use it. If not use Rufus.
You have two options, Rufus, or Rufus portable. Portable does not need to be installed, click and run. Delete the Rufus exe file when your finished If you use this utility often, install it on the system so you don’t need to hunt for for it every time you need it.
Upon opening Rufus you have several options:
- Device: USB memory flash drive you wish to write to
- Boot Selection: Image you want to write (click the select button to open the file manager)
- Partition scheme: Leave this alone
- Target system: For these Protectli computers use BIOS or UEFI
- If you’re unsure choose BIOS
- Volume label: I leave this alone, some ISO’s will write this for you, and expect a specific label for install
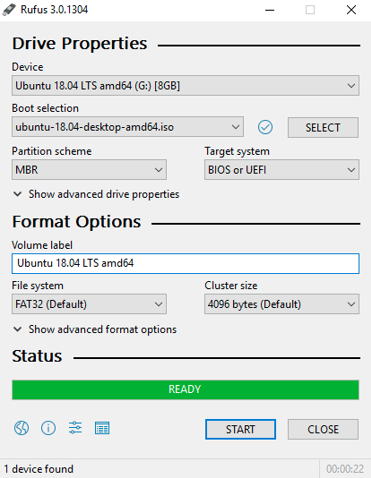 Example Settings - I’m going to erase an old Ubuntu installer
Installing the operating system
We are now ready to install OPNsense on the hardware. Connect a USB keyboard, HDMI (use the one near the serial port), boot media you created above, and the 12v power supply.
Press the power button on the left.

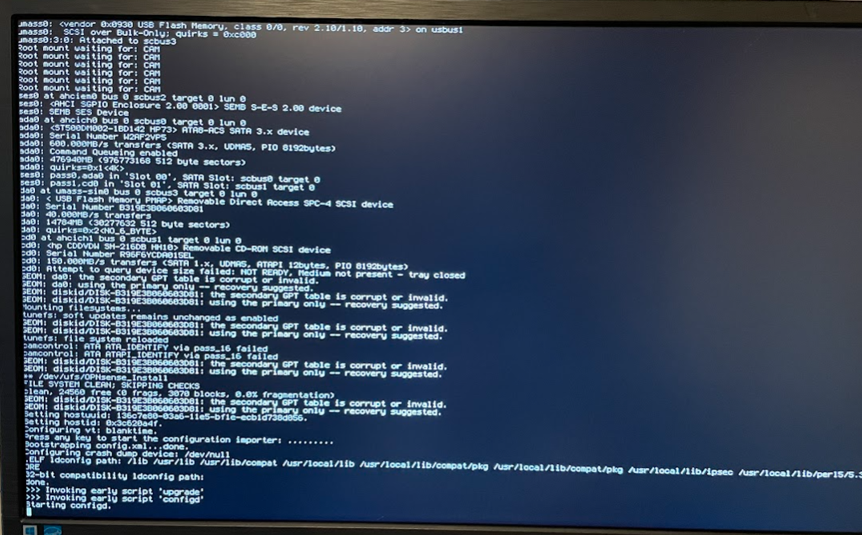
The system should boot from the USB flash drive.
Do not set interfaces here, this is the installer.
You will be prompted to provide a username and password. We want to invoke the installer, login with user “installer” and password “opnsense”.
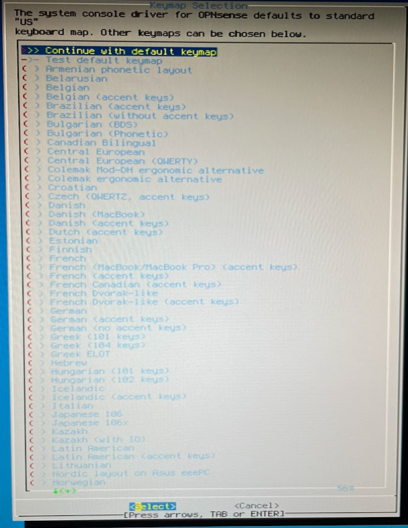
Press enter to use the default keymap.
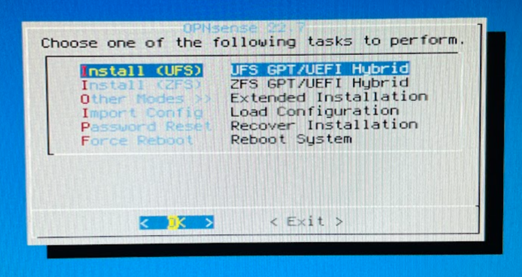
Press enter to use UFS.
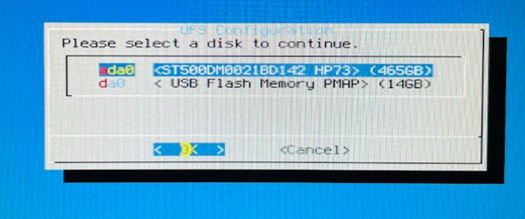
Select your target install location. You should see two, the boot media you created and the SSD. The name will vary depending on the model and size.

Press enter to create a swap partition.
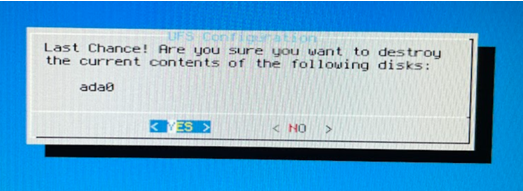
Select Yes and press enter to format the hard drive and begin the installation.
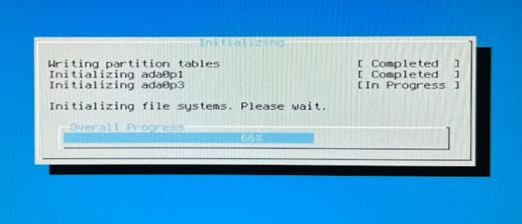
The installer will prep the drive and install the needed files. You don’t need to do anything until it completes.
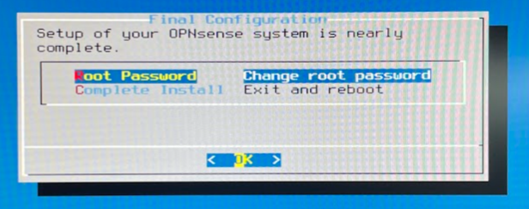
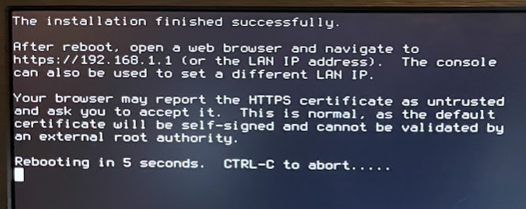
Press enter to set a password or select complete install to use the defaults. The default credentials after a fresh install are username “root” and password “OPNsense”. Remove the flash drive.
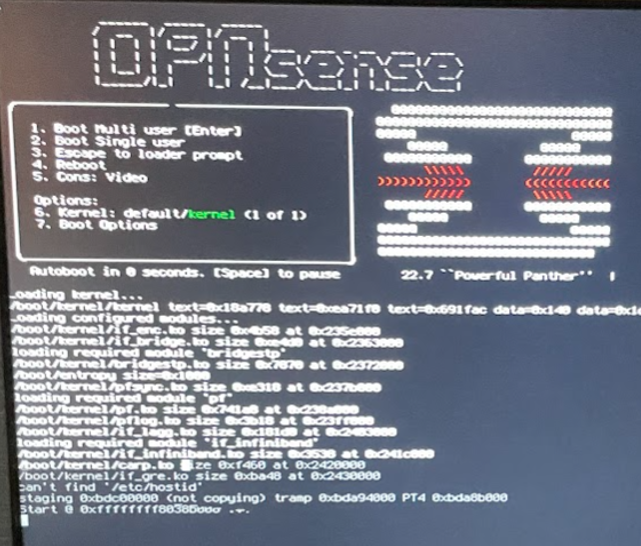
Let the system autoboot.
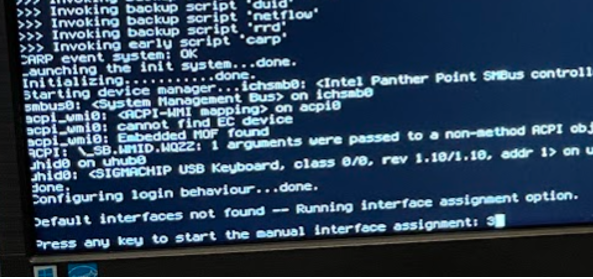
If you know the interface numbers, they can be assigned here, otherwise just leave this alone to assign them later. The system will auto assign interfaces.
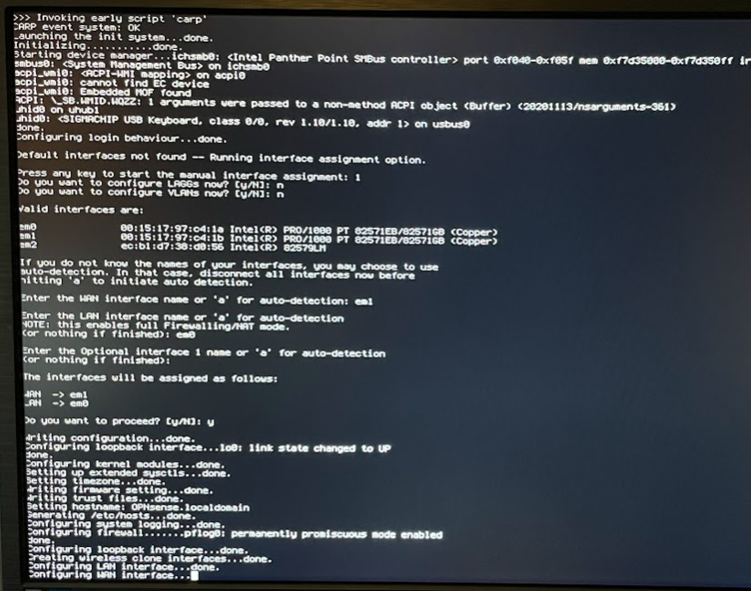
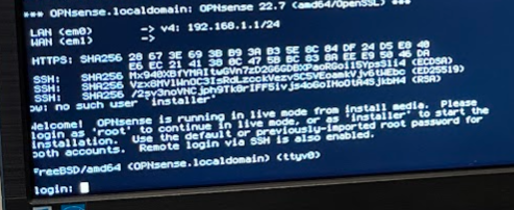
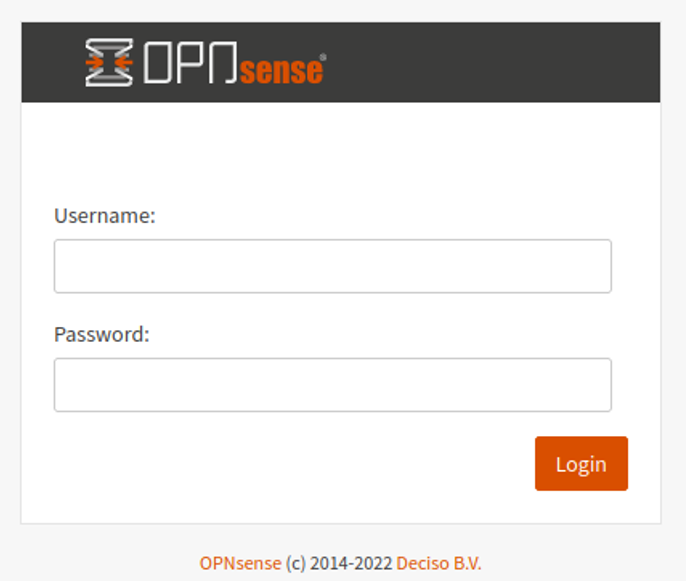
The default credentials after a fresh install are username “root” and password “OPNsense”. At this point, connect a computer to the LAN interface and type the listed IP address into a browser window. In the case you would type 192.168.1.1 into the browser address bar.
Configuring the system
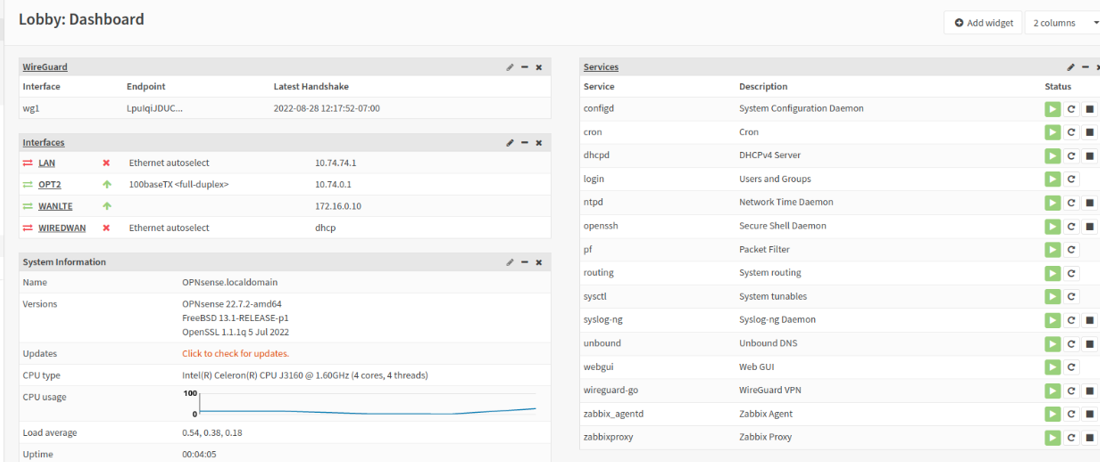
You should be looking at a dashboard after you login.
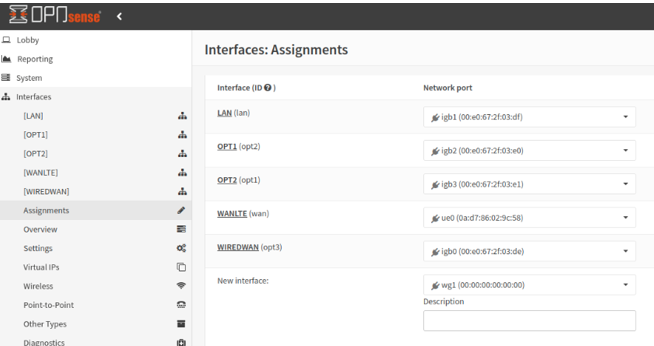
Interfaces
Select interfaces and assignments from the left menu.
To create an interface, select from the available hardware in the New Interface drop-down and click the orange plus sign to the right. Do not worry about the NAME for now, we will change these later. We are assigning the MAC address/hardware name to the OPNsense interface name.
Warning:
Do not delete or mess with the LAN interface! This is how you’re configuring the system.
Assign as follows:
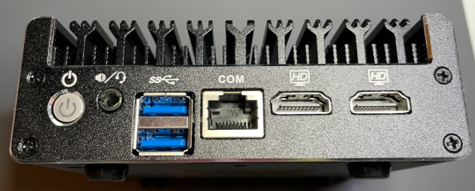
- WAN - Port labeled WAN on the case. For me this was igb0.
- WAN is used for wired internet access, primary or backup connectivity.
- LAN – Port labeled LAN on the case, For me this was igb1.
- LAN is used for local network access
- OPT1 – Create this if you want, assign port labeled OPT1 on the case, igb2
- OPT1 is unused
- OPT2 – Create this if you want, assign port labeled OPT2 on the case, igb3
- OPT2 is unused
- WANLTE – Create this, assign the LTE card, ue0
- WANLTE is used as primary or backup connectivity.
Tip:
To help find what interface is what label, plug another device into each port one at a time. The OPNsense should show the interface as up.
IP Addresses
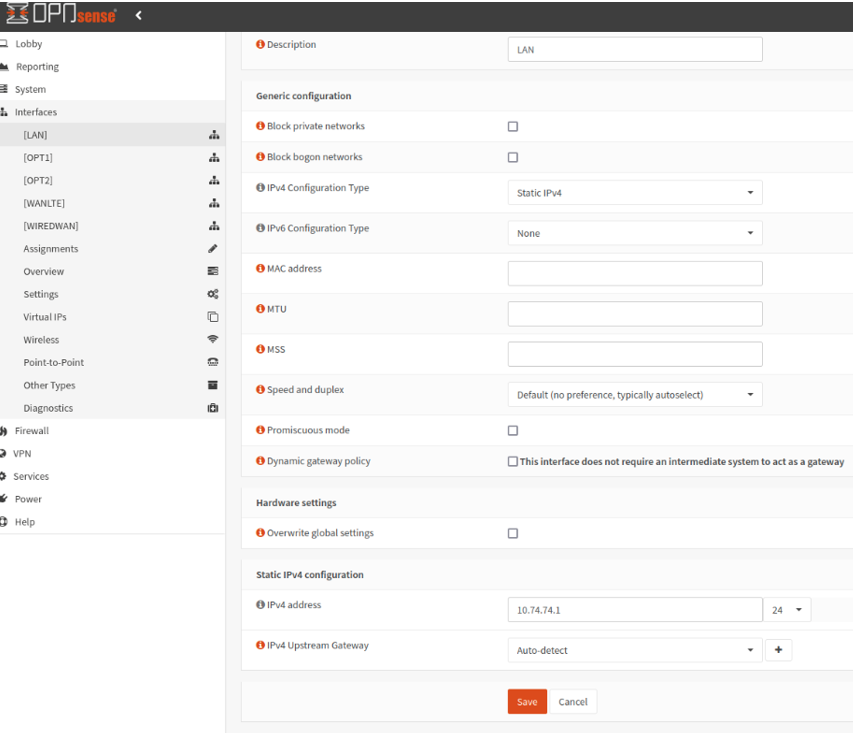
Select interfaces and LAN. Since we’re using Wireguard to connect this router to another router, we need to use non-overlapping subnets.
For example: 10.74.74.0/24 does not overlap with 10.99.99.0/24.
Choose a subnet for LAN, OPT1, OPT2 (if you’re using these interfaces) and Wireguard tunnel. If your other side, the remote location to this router, has IP addresses assigned already don’t overlap any of these subnets either. Write all these down so you can refer back to what goes where.
Where you use private IP addresses (RFC 1918) be sure to uncheck “Block private networks”. Block bogon is mostly unimportant for our configuration, I prefer to uncheck it and manage this via firewall rules.
Caution:
If you change the LAN IP and save, the IP address used to access this management interface will change to that IP.
Tip:
My specific use case for this router was to remotely monitor equipment. The equipment being monitored is not IPv6 capable so this proof of concept had it disabled. I use a philosophy of, if you don’t actively use it, turn it off.
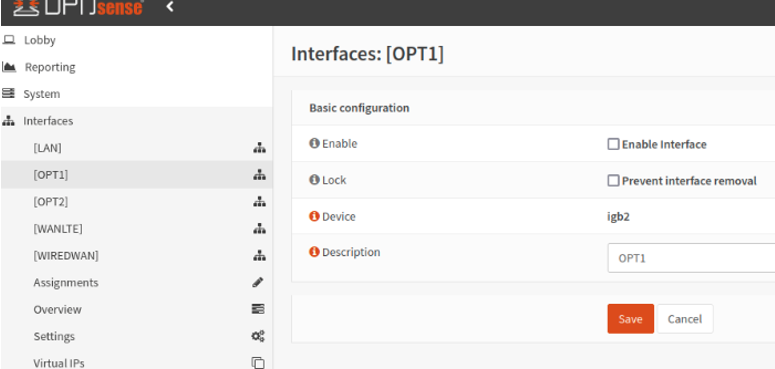
Interface Labels
Correct the labels and disable any interfaces you’re not using.
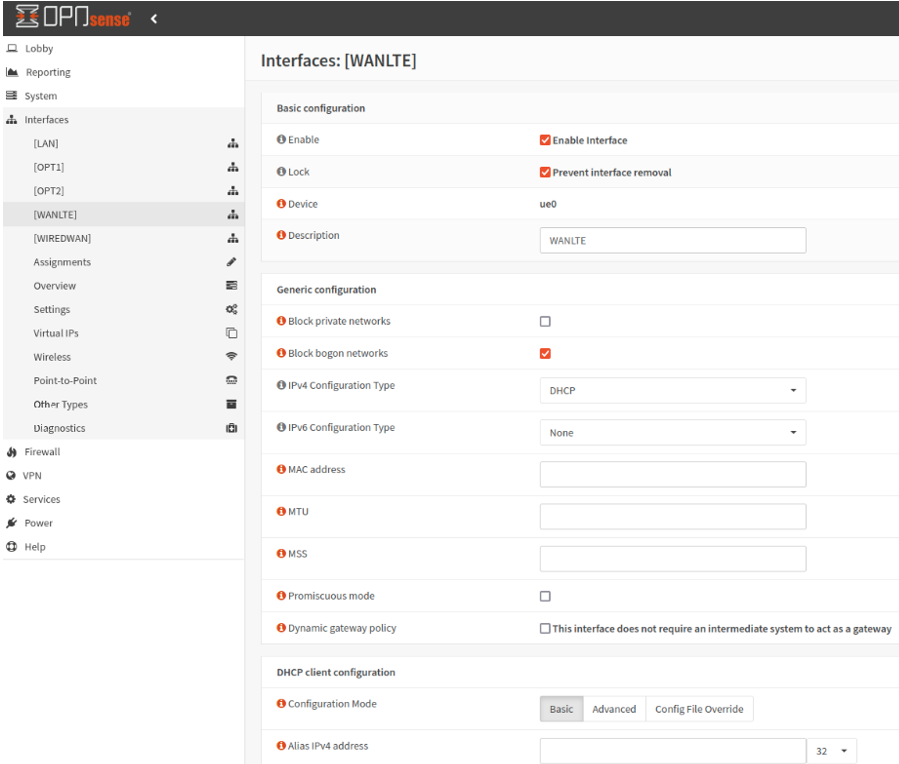
Enable WAN and the LTE interface. I named them WIREDWAN and WANLTE to make it easy for someone behind me to understand what is what.
In my case both WIREDWAN and WANLTE have the same configuration. Enabled, DHCP on IPv4, disable IPv6, “Block private networks” and “Block bogon networks” are both unchecked.
With the interfaces setup you can now connect the router to any internet connected network.
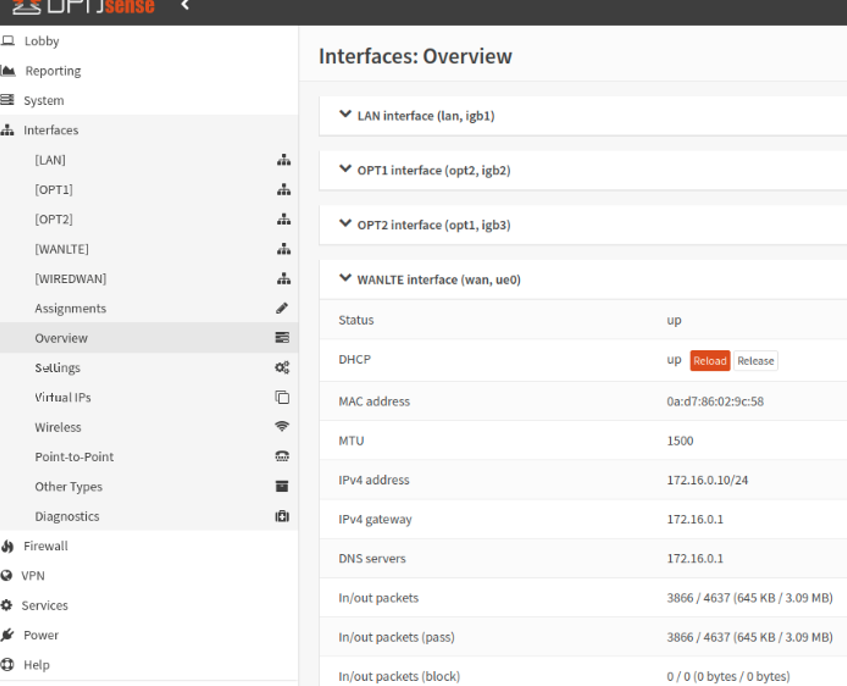
Here I have an IP from the LTE interface.
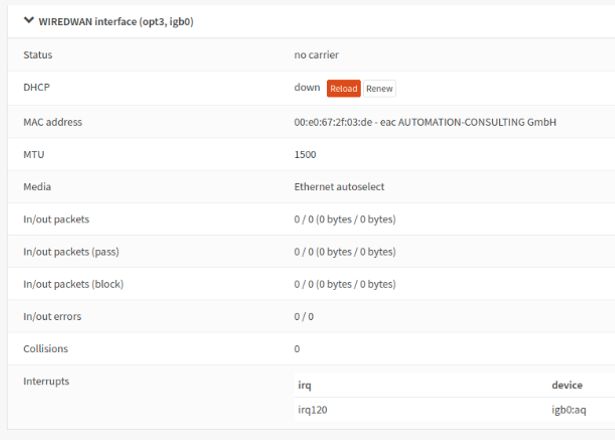
The WAN reports no carrier because I haven’t plugged in the cable.
You should have connectivity for the operating system (depending on the interface used), you might not have connectivity for anything else. In any case, let’s set up the gateways. Afterward, we will configure the firewall to allow traffic. The OPNsense the firewall blocks everything by default.
This post is already crazy long, so I’m going to end it here and pick it up in another post.
Comments powered by Disqus.